
쨍쨍
[Android Studio] 채팅 어플리케이션 본문
[ 서버 ]
main.java
import java.io.IOException;
import java.io.PrintWriter;
import java.net.ServerSocket;
import java.net.Socket;
import java.util.ArrayList;

public class Main {
    public static ArrayList<PrintWriter> OutputList;

    public static void main(String[] args) {
        OutputList = new ArrayList<>();
        System.out.println("서버가 시작되었습니다. 클라이언트의 연결 요청을 기다리고 있습니다...");
        try {
            ServerSocket serversocket = new ServerSocket(8000);
            while (true) {
                Socket clientsocket = serversocket.accept();
                System.out.println("[클라이언트 연결]");
                PrintWriter writer = new PrintWriter(clientsocket.getOutputStream(), true);
                OutputList.add(writer);
                System.out.println(OutputList.size());

                ClientManagerThread thread = new ClientManagerThread(clientsocket);
                thread.start();
            }
        } catch (IOException e) {
            e.printStackTrace();
        }
    }
}
clientManagerThread.java
import java.io.BufferedReader;
import java.io.IOException;
import java.io.InputStreamReader;
import java.io.PrintWriter;
import java.net.Socket;

public class ClientManagerThread extends Thread {
    private Socket memsocket;

    public ClientManagerThread(Socket socket) {
        memsocket = socket;
    }

    public void run() {
        try {
            BufferedReader in = new BufferedReader(new InputStreamReader(memsocket.getInputStream()));
            String text;

            while (true) {
                text = in.readLine();
                if (text != null) {
                    sendToAllClients(text);
                }
            }
        } catch (IOException e) {
            e.printStackTrace();
        } finally {
            try {
                memsocket.close();
            } catch (IOException e) {
                e.printStackTrace();
            }
        }
    }

    private void sendToAllClients(String message) {
        synchronized (Main.OutputList) {
            for (PrintWriter writer : Main.OutputList) {
                writer.println(message);
                writer.flush();
            }
        }
    }
}
[ 클라이언트 ]
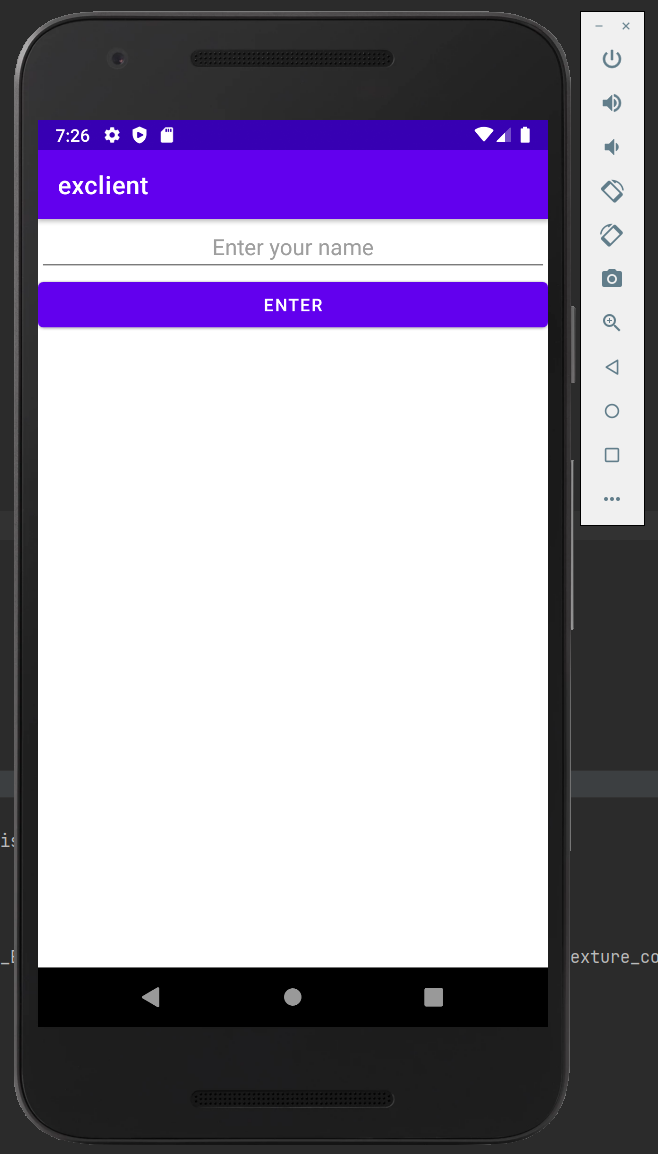
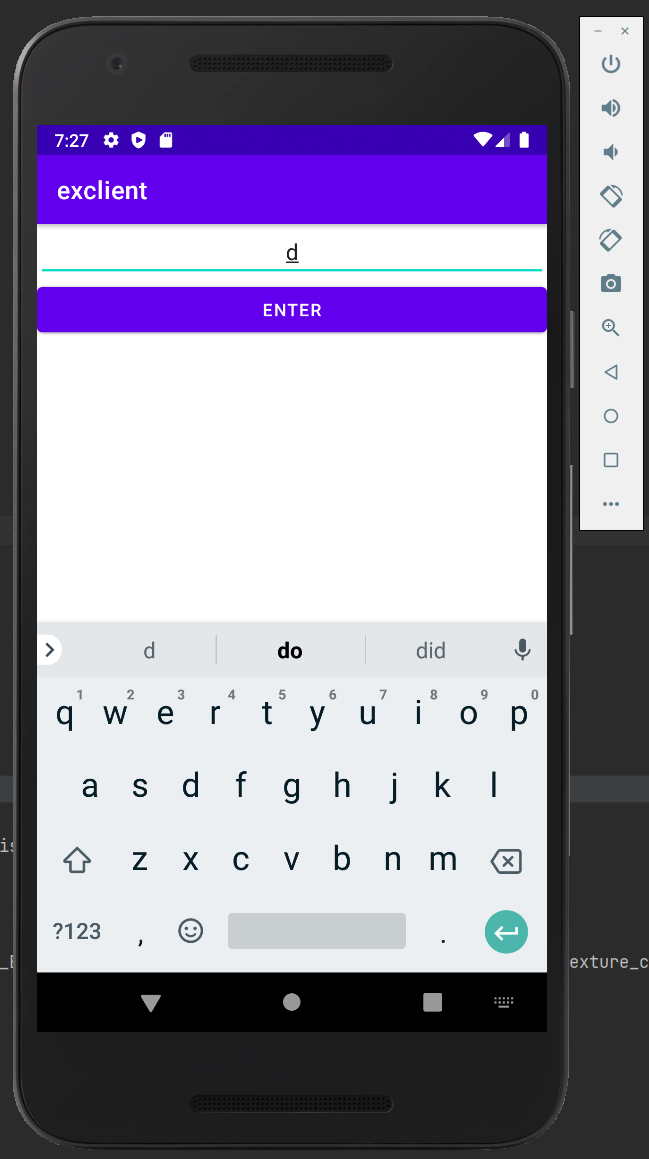
activity_main.xml
<LinearLayout xmlns:android="http://schemas.android.com/apk/res/android"
    xmlns:app="http://schemas.android.com/apk/res-auto"
    xmlns:tools="http://schemas.android.com/tools"
    android:layout_width="match_parent"
    android:layout_height="match_parent"
    android:orientation="vertical"
    tools:context=".EnterActivity">

    <EditText
        android:id="@+id/editText"
        android:layout_width="match_parent"
        android:layout_height="wrap_content"
        android:gravity="center"
        android:hint="Enter your name" />

    <Button
        android:id="@+id/enterButton"
        android:layout_width="match_parent"
        android:layout_height="wrap_content"
        android:gravity="center"
        android:text="ENTER"/>
</LinearLayout>
EnterActivity.java
import androidx.appcompat.app.AppCompatActivity;

import android.content.Intent;
import android.os.Bundle;
import android.view.View;
import android.widget.Button;
import android.widget.EditText;

public class EnterActivity extends AppCompatActivity {
    EditText editText;
    Button enterButton;

    @Override
    protected void onCreate(Bundle savedInstanceState) {
        super.onCreate(savedInstanceState);
        setContentView(R.layout.activity_main);
        // 레이아웃 파일인 activity_main.xml을 액티비티의 레이아웃으로 설정
        enterButton = (Button)findViewById(R.id.enterButton);
        editText = (EditText)findViewById(R.id.editText);

        enterButton.setOnClickListener(new View.OnClickListener() {
            @Override
            public void onClick(View v) {
                Intent intent = new Intent(getApplicationContext(),MainActivity.class);
                String username = editText.getText().toString();
                // editText에서 사용자가 입력한 문자열을 가져와 username 변수에 저장합니다.
                intent.putExtra("username",username);
                // Intent에 username 변수를 "username"이라는 이름으로 추가합니다.
                startActivity(intent);
            }
        });

    }
}
Intnet
Android 애플리케이션에서 컴포넌트간 통신이나 작업을 수행하기 위해 사용되는 객체
[ 닉네임 설정 ]
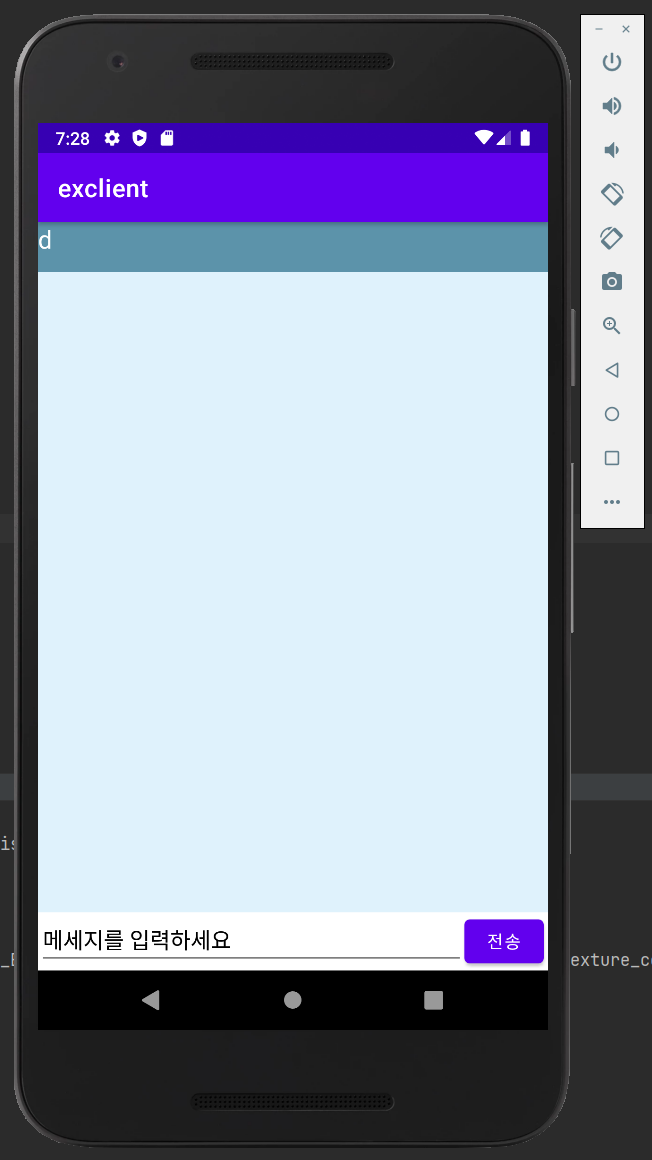
main.xml
<LinearLayout xmlns:android="http://schemas.android.com/apk/res/android"
    xmlns:app="http://schemas.android.com/apk/res-auto"
    xmlns:tools="http://schemas.android.com/tools"
    android:layout_width="match_parent"
    android:layout_height="match_parent"
    android:orientation="vertical"
    tools:context=".MainActivity">

    <LinearLayout
        android:layout_width="match_parent"
        android:layout_height="40dp"
        android:background="@color/pblue"
        android:orientation="horizontal">

        <TextView
            android:id="@+id/UserID"
            android:layout_width="83dp"
            android:layout_height="match_parent"
            android:text="닉네임"
            android:textSize = "20sp"
            android:textColor="#FFFFFFFF" />
    </LinearLayout>
    <ScrollView
        android:id="@+id/scroll"
        android:layout_width="match_parent"
        android:layout_height="0dp"
        android:layout_weight="1"
        android:background="@color/ppblue">
        <LinearLayout
            android:id="@+id/layout"
            android:layout_width="match_parent"
            android:layout_height="wrap_content"
            android:orientation="vertical">

            <TextView
                android:id="@+id/chatView"
                android:layout_width="match_parent"
                android:layout_height="856dp"
                android:background="@color/ppblue"
                android:padding="10dp"
                android:textColor="#FF000000" />


        </LinearLayout>


    </ScrollView>


    <LinearLayout
        android:layout_width="match_parent"
        android:layout_height="wrap_content"
        android:orientation="horizontal">

        <EditText
            android:id="@+id/message"
            android:layout_width="344dp"
            android:layout_height="wrap_content"
            android:text="메세지를 입력하세요"
            android:textColor="#FF000000" />

        <Button
            android:id="@+id/chatbutton"
            android:layout_width="64dp"
            android:layout_height="47dp"
            android:text="전송" />

    </LinearLayout>
</LinearLayout>
MainActivity.java
import androidx.appcompat.app.AppCompatActivity;

import android.content.Intent;
import android.os.Bundle;
import android.os.Handler;
import android.view.View;
import android.widget.Button;
import android.widget.EditText;
import android.widget.TextView;
import java.io.BufferedReader;
import java.io.IOException;
import java.io.InputStreamReader;
import java.io.PrintWriter;
import java.net.InetAddress;
import java.net.Socket;

public class MainActivity extends AppCompatActivity {
    private Handler mHandler;
    // 백그라운드 스레드와 기본 UI 스레드 간의 통신을 허용
    InetAddress serverAddr;
    Socket socket;
    // 서버와의 연결을 설정하는 데 사용
    private BufferedReader receiveReader;
    // 소켓에서 데이터를 읽는 데 사용
    private PrintWriter sendWriter;
    // 데이터를 서버로 전송하는 데 사용
    private String ip = "본인의 아이피 주소";
    private int port = 8000;

    //private TextView textView;
    TextView textView;
    // 사용자의 ID를 저장
    String UserID;
    //private Button chatbutton;
    Button chatbutton;
    //private TextView chatView;
    TextView chatView;
    // 대화 메시지를 표시하는 데 사용
    //private EditText message;
    EditText message;
    //private String sendmsg;
    String sendmsg;
    // 전송할 메시지를 저장
    //private String read;
    String read;
    // 수신된 메시지를 저장

    @Override
    protected void onStop() {
        // onStop은 앱이 종료될 때 실행되는 메소드로 sendWriter과 socket을 닫아준다.
        super.onStop();
        try {
            if (sendWriter != null) {
                sendWriter.close();
            }
            if (socket != null) {
                socket.close();
            }
        } catch (IOException e) {
            e.printStackTrace();
        }
    }

    @Override
    protected void onCreate(Bundle savedInstanceState) {
        // onCreate는 onStop과 반대로 앱이 실행될 때 실행되는 메소드
        super.onCreate(savedInstanceState);
        setContentView(R.layout.main);
        // main.xml 파일에 정의된 레이아웃으로 설정

        mHandler = new Handler();

        textView = (TextView) findViewById(R.id.UserID);
        // main.xml에서 R.id.UserID로 정의된 TextView를 찾아옵니다. 이 뷰는 textView 변수에 할당
        chatView = (TextView) findViewById(R.id.chatView);
        // main.xml에서 R.id.chatView로 정의된 TextView를 찾아옵니다. 이 뷰는 chatView 변수에 할당
        message = (EditText) findViewById(R.id.message);
        // main.xml에서 R.id.message로 정의된 EditText를 찾아옵니다. 이 뷰는 message 변수에 할당
        chatbutton = (Button) findViewById(R.id.chatbutton);

        Intent intent = getIntent();
        // 액티비티 간에 데이터를 전달하는 Intent 객체를 생성

        UserID = intent.getStringExtra("username");
        // 앞서 생성한 Intent 객체에서 "username"이라는 이름으로 저장된 문자열을 가져와서 UserID 변수에 저장
        textView.setText(UserID);
        // textView라는 TextView 객체에 UserID 값을 설정하여 화면에 표시


        new Thread() {
            // 소켓 통신을 위한 스레드를 생성하고 실행합니다.
            public void run() {
                try {
                    InetAddress serverAddr = InetAddress.getByName(ip);
                    //InetAddress.getByName(ip)는 지정된 IP 주소를 가진 호스트의 인터넷 주소를 반환
                    socket = new Socket("본인의 아이피 주소", port);
                    //Socket(serverAddr, port)는 서버에 접속하기 위한 소켓을 생성
                    sendWriter = new PrintWriter(socket.getOutputStream());
                    //socket.getOutputStream()으로 소켓의 출력 스트림을 얻어서 PrintWriter에 연결
                    // 즉, 서버로 데이터를 전송하기 위한 PrintWriter 객체 생성
                    BufferedReader input = new BufferedReader(new InputStreamReader(socket.getInputStream()));
                    //BufferedReader를 사용하여 소켓으로부터 받은 메시지를 읽음.
                    // 즉, 서버에서 데이터를 받아오기 위한 BufferedReader 객체 생성
                    while(true){
                        read = input.readLine();
                        //input.readLine()을 사용하여 소켓으로부터 메시지를 읽는다.
                        if(read!=null){
                            mHandler.post(new msgUpdate(read));
                            //mHandler를 사용하여 UI 쓰레드에서 msgUpdate 객체를 실행시켜서 메시지를 화면에 출력
                        }
                    }
                } catch (IOException e) {
                    e.printStackTrace();
                }} }.start();

        // 메세지를 보내는 코드
        chatbutton.setOnClickListener(new View.OnClickListener() {
            // chatbutton 버튼을 클릭했을 때 실행되는 이벤트를 처리
            @Override
            public void onClick(View v) {
                sendmsg = message.getText().toString();
                // sendmsg 변수에 message EditText에서 입력받은 문자열을 저장
                new Thread() {
                    @Override
                    public void run() {
                        super.run();
                        try {

                            if (sendWriter != null) { // sendWriter 객체가 null이 아니면

                                sendWriter.println(UserID + " > " + sendmsg);
                                // 서버로 메시지를 전송
                                sendWriter.flush();
                                // 버퍼에 남아있는 내용을 모두 보낸 후, 출력 버퍼를 비움
                            }


                        } catch (Exception e) {
                            e.printStackTrace();
                        }
                    }
                }.start();
            }
        });
    }

    class msgUpdate implements Runnable{
        private String msg;
        // 문자열 타입의 msg 선언
        public msgUpdate(String str) {this.msg=str;}
        // msgUpdate 클래스의 매개변수 str로 받은 문자열을 msg 인스턴스 변수에 할당

        @Override
        public void run() {
            chatView.setText(chatView.getText().toString()+msg+"\n");
            // chatView의 setText() 메서드를 호출하여, chatView에 새로운 텍스트를 설정.
        }
    }
}
Handler
UI 스레드와 다른 백그라운드 스레드 사이의 통신을 가능하게 해주는 클래스로 이를 통해 스레드 간에 메세지를 전달하고 처리할 수 있음.
안드로이드에서는 UI 업데이트는 메인 스레드 또는 UI 스레드에서 수행되어야 합니다. 백그라운드 스레드에서 UI를 직접 업데이트하면 앱이 불안정하게 동작하거나 예기치 않은 동작이 발생할 수 있기에 Handler을 사용하여 백그라운드 스레드에서 메인 스레드로 UI 업데이트를 요청해 안전하게 UI가 업데이트되고 앱의 안정성이 향상됨
setText()
텍스트 뷰(TextView)나 에디트 텍스트(EditText)와 같은 텍스트를 표시하는 뷰(View)의 내용을 설정하는 역할
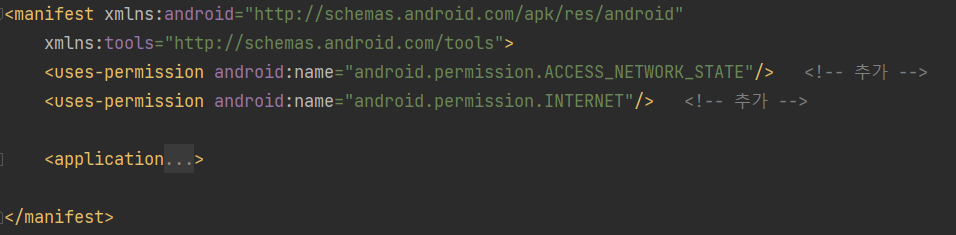
AndroidManifest.xml
안드로드 스튜디오에 인터넷 퍼머션을 설정해주기 위해서 AndroidManifest.xml에 아래와 같은 코드를 설정해주어야 한다.
[ 채팅 화면 ]

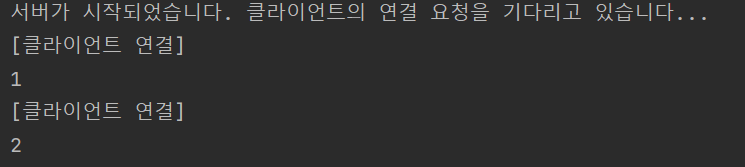
[ 클라이언트가 서버에 연결됐을 때의 서버 콘솔 ]
'프로그래밍 코드 > Android Studio' 카테고리의 다른 글
| #2. AI smart home (0) | 2024.03.13 |
|---|---|
| #1. AI smart home (0) | 2024.03.13 |
| [Android Studio] 클릭 이벤트를 사용하는 4가지 방법 (0) | 2023.05.22 |
| [Android Studio] 뷰 바인딩(View Binding) (0) | 2023.05.17 |
| [Android Studio] 레이아웃 (0) | 2023.05.16 |
'프로그래밍 코드/Android Studio' Related Articles
more


